Hi all!
Its been a while! i know, i hv been busy with THIS project
SOOO EXCITED!!
get ur old chair ready, and follow my step
its a economic friendly makeover!
All you need in this tutorial is:
-old chair
-white colour paint (its a MUST! if you plan to do makeover a lot, i already hv one tin at home)
-screw driver (im sure anyone have it at home right!?)
-pilers (or anything you have at home to remove a staple,i used screw driver instead!)
-hammmmmer!
-staple gun (i hvnt got one, and not many ppl i know got one, so i use screws and hammer instead)
-fabric! (your fav fabic to make the seat looks the way you like)
-scissors
lets the show begins..........
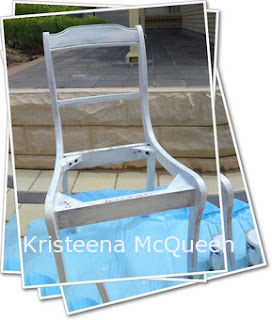
Here is my old dining chair, still usable, but outdated!
A very doable chair!
only chipped a bit ;)
step 1: remove the seat by screw driver and put the screw to somewhere "save" lol
and now its the seatless chair
Step 2: normally you are recommended to use sandpaper to remove existing paint, then apply undercoat.
But im too lazy and its a economic friendly makeover, im doing it MY WAY!
minimise the cost and material and still get the same beautiful effect!
Clean the chair thoroughly using damp cloth
Then we can start painting =]
the other reason im not applying undercoat b/c the chair is gona be white colour,
so apply 2 coats of white paint, allow time to dry between coat.
Use undercoat if you are painting your chair to other colour but white =]
The finish look:
i love it !!* mwa
Step 3: mix a tiny bit of white and pink paint together
Step 4: paint it on edges and the curves.
the effect should be random but not deliberate!
Thats for the frame, now move on to the seat =]
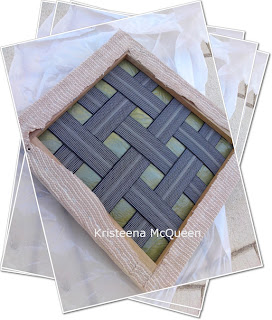
Step 5: Remove the old upholstery fabric from the seat using pliers (i used screw driver,and yes, my fingers hurted =[ ) to remove staples. Tetain the piece of fabric and use it as a template to cut a new cover from your fav upholstery fabric.
Step 6: centre the seat face down on your fav fabric. working one edge at a time, fold the edges up and over to the back, placing a staple (i use pin here) parallel to the seat edge inthe middle of each side, i guess its about 2cm in from the edge. stretch and smooth the fabric as you work to achieve a smooth finish!
when you reach the corner, fold the fabric over onedge at a time to make a neat corner and apply stalpes closer together!!
Step 7: now, drop the gorgeous seat back into its cavity!!
do u like it??
i have added some dark colour around edges to make it look aged!
it wud look much better if the pink lace is a bit more pinkish =/
anyways, i now have 2 "brand new" chairs!
plus 1 old chair sitting in the garage waiting for me to renew its life! lol
FUN, FUN, FUN!
thats wat i do at home, so if anybody asks me "how ur weekend?" i wud b like "gr8!"
but sadly not everyone understand how fun it is to DIY, and how great the new product can be!
Peace out!
K. McQueen
xox


No comments:
Post a Comment
<3 Appreciate for your comments <3